Choosing glue for an optical lens cutting tool is a workholding decision. The bond must keep the blank stable on its carrier during cutting, then release without leaving residue or damaging the material, coating or fixture. The right choice depends on the substrate, carrier, cutting fluid, load, geometry and release method; no single glue is suitable for every setup.
This guide combines the two existing glue-selection articles into one practical qualification workflow. It concerns temporary workholding for cutting, not optical cementing, lens bonding in an assembly, or coating application.
What the adhesive must do
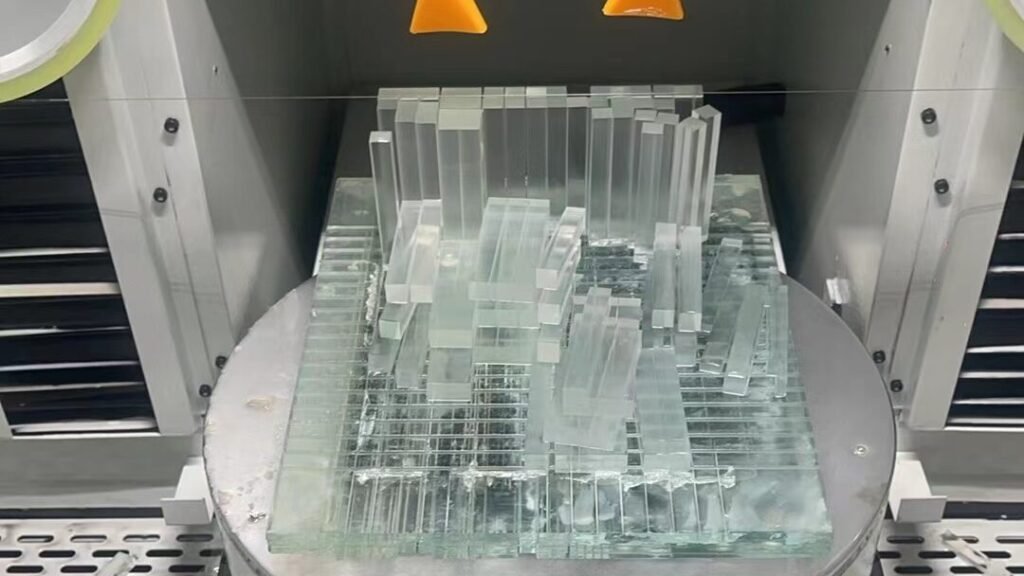
During a cut, the blank and carrier form a workholding system. Adhesive performance is only one part of that system: carrier flatness, bond area, surface preparation, alignment and support also affect stability. A suitable process should hold the part against the forces expected in the actual cut and permit controlled release afterward.
- Hold consistently: avoid movement, rocking or separation through the full cutting path.
- Match the interfaces: check the exact optical material, any coating, carrier material and adhesive.
- Withstand the process: verify compatibility with the cutting fluid, temperature and contact conditions used on the machine.
- Release cleanly: select a release method that does not scratch, stain, contaminate or thermally damage the part.
- Repeat across the batch: control application, cure or set condition, bond area and removal so results do not depend on operator guesswork.
Compare adhesive approaches by the process
Product names and adhesive families do not establish suitability by themselves. Use the supplier’s technical data and safety information, then test the complete mount-and-release sequence on representative material.
| アプローチ | What to evaluate | Key qualification question |
|---|---|---|
| Optical pitch or wax | Softening and setting behavior, bond stability, contamination and removal method | Does it remain stable under the process conditions and release without residue or damage? |
| Curable liquid adhesive | Substrate compatibility, cure method, bond-line consistency and release behavior | Can the material be cured consistently on the actual carrier, and can it be removed safely? |
| Pressure-sensitive or release media | Adhesion at the contact area, edge support, fluid exposure and removal force | Does the media prevent slip without transferring residue or lifting during cutting? |
These are comparison categories, not product recommendations. Confirm the specific grade and instructions with the adhesive supplier and the machine manufacturer before production use.
Check material, fixture and cutting conditions
Start with the exact material designation rather than a broad label such as “optical glass.” Different glasses, crystals, coatings and carrier surfaces can respond differently to solvents, heat and mechanical release. Record the part’s condition before mounting and identify any surface that must not contact adhesive or cleaning agents.
Next, document the carrier and bond geometry. The adhesive should support the workpiece without obstructing the cutting path. Avoid relying on a thick or uneven bond to compensate for a poor fixture. If the process uses coolant or another fluid, verify compatibility using the actual fluid and exposure conditions. Do not assume that a product suitable for dry cutting will behave the same in a wet process.
Qualify the mount-and-release sequence
- Define acceptance criteria. Specify allowable movement, edge condition, residue, surface or coating changes, and cleaning requirements before the trial.
- Check supplier instructions. Review the technical data and safety information for the adhesive, release agent and cleaning method. Confirm compatibility for the material and carrier.
- Run a representative coupon test. Use the same material, fixture, application method, cutting fluid and release sequence planned for production.
- Inspect before and after cutting. Record whether the part shifted, whether the bond remained stable, and whether residue or visible damage appeared after release.
- Repeat and document. Confirm the result across repeat trials, then record surface preparation, application, cure or set condition, cutting setup and removal steps in the work instruction.
Change one process variable at a time during qualification. If the part moves, inspect fixture support and alignment as well as the adhesive; a stronger bond alone may not correct an unstable mounting arrangement.
Troubleshoot common workholding symptoms
| Observed symptom | Checks to make |
|---|---|
| Part shifts or tilts | Review carrier flatness, support, bond area, surface preparation, application consistency and cutting conditions. |
| Adhesive remains on the part | Check the selected release method, cure or set condition, material compatibility and cleaning procedure. |
| Surface or coating changes after release | Stop the process and verify chemical and thermal compatibility with the material and coating supplier before further trials. |
| Results vary between operators or batches | Standardize preparation, amount and placement, cure or set verification, fixture alignment and release steps. |
Build a repeatable selection rule
Choose an adhesive only after the complete workholding sequence passes the agreed criteria on representative parts. Keep the approved product specification, supplier instructions, test results and work instruction together. Requalify when the optical material, coating, carrier, cutting fluid, fixture or release method changes.
For the wider cutting process, see our optical lens cutting guide. To compare available equipment, visit the equipment range. For a sample-cut discussion, send the material, blank dimensions, drawing and production quantity through our アプリケーションコンタクトページ.